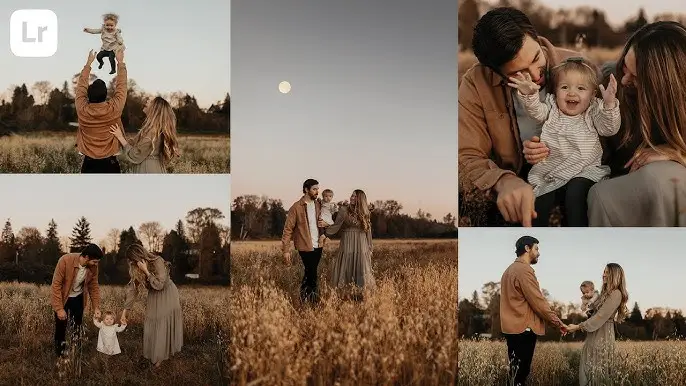
Edit Cinematic Photos Using Lightroom: Free Presets & Guide 2025
In the world of photography, the cinematic look has become one of the most sought-after styles—loved for its deep tones, dramatic contrasts, and storytelling feel. Whether you’re a professional photographer or a creative hobbyist, learning how to edit cinematic photos using Lightroom can completely transform your visuals. This guide will walk you through everything from the tools and techniques to free preset downloads that will help you achieve that stunning film-inspired vibe in 2025.

What Does a Cinematic Photo Mean?
A cinematic photo mimics the mood and tone of movies. It often features moody lighting, rich color grading, soft contrast, and a storytelling composition that feels like a frame from a film. The goal is to make your image feel emotional, immersive, and visually balanced—like it belongs on the big screen.
Adobe Lightroom, whether used on desktop or mobile, is one of the most powerful tools to achieve this look. With the right adjustments, you can turn ordinary photos into cinematic masterpieces in just a few steps.
Why Use Lightroom for Cinematic Editing?
If you’re wondering why Lightroom stands out for this kind of edit, the answer lies in its precision control and non-destructive workflow. Whether you’re working on Lightroom Mobile or Lightroom Classic, you can easily control exposure, contrast, color balance, and texture to create a film-like atmosphere.
Here’s why Lightroom is perfect for cinematic edits:
- It supports RAW photo editing for better detail and dynamic range.
- You can use Lightroom cinematic presets to instantly apply movie-style tones.
- It allows color grading using the HSL and Color Mixer tools.
- The Tone Curve and Split Toning panels help create a moody, filmic contrast.
- It’s available across platforms—desktop, mobile, and online.
Step-by-Step: How to Edit Cinematic Photos in Lightroom (2025)
Let’s dive into the process of achieving cinematic visuals using Lightroom.
Step 1: Import and Prepare Your Photo
Start by importing your image into Lightroom. For best results, use RAW format, as it gives you more flexibility when editing tones and highlights.
Once your photo is in Lightroom, go to the Develop module (on desktop) or the Edit panel (on mobile).
Step 2: Adjust the Exposure and Contrast
Cinematic photos often feature a controlled contrast—not too bright, not too flat.
- Lower the Highlights slightly.
- Boost Shadows to reveal detail in dark areas.
- Increase Contrast moderately.
- Adjust Whites and Blacks to create a smooth tonal balance.
This step sets the foundation for your cinematic edit in Lightroom Mobile or desktop.
Step 3: Fine-Tune the Tone Curve
The Tone Curve is the secret weapon for cinematic looks.
- Create a gentle “S-curve” by slightly lowering the shadows and lifting the highlights.
- Add a faded effect by pulling up the shadow end of the curve.
- This gives your image that soft film look similar to the 35mm film effect in Lightroom Mobile.
Step 4: Work with Color Grading
Color grading defines the cinematic style. Go to the Color Mixer (HSL) and play with individual color tones.
- Reduce the saturation of overly vibrant colors.
- Push the yellows and greens toward orange for a warm cinematic glow.
- Add a blue-green tint to the shadows and an orange tint to the midtones using Split Toning or Color Grading panel.
This creates that teal and orange look, popular in films and cinematic photos.
Step 5: Add Clarity and Texture
Cinematic photos tend to have a soft-yet-detailed look.
- Lower Clarity slightly for a dreamy effect.
- Increase Texture and Sharpness subtly to retain detail in key areas like the subject’s face or objects in focus.
This balance ensures your edit doesn’t look overly digital or flat.
Step 6: Use Masks for Depth
Lightroom’s AI-powered masking tools (2025) are a game-changer for cinematic editing.
Use masks to emphasize your subject and control depth of field:
- Select Subject Mask to isolate the main focus.
- Lower exposure slightly around the background using the Linear Gradient tool.
- This creates a natural depth, mimicking the look of a wide-aperture film lens.
If you’re using Lightroom Mobile, you can use Select Subject AI under the masking menu for similar results.
Step 7: Apply or Create a Cinematic Preset
If you want to speed up your workflow, try using cinematic Lightroom presets.
You can find many free cinematic presets for Lightroom Mobile and Desktop online. These presets usually include color grading, tone curves, and texture settings that instantly give your photos a film-inspired look.
Some popular styles include:
- Cinematic Orange & Teal Preset
- Moody Urban Preset
- 35mm Film Effect Preset
- Soft Vintage Film Look
After applying a preset, always tweak it according to your photo’s lighting and mood for best results.
Editing Cinematic Photos in Lightroom Mobile
If you prefer editing on your phone, Lightroom Mobile offers almost all the features of its desktop version.
Tips for Mobile Users:
- Import your image from your phone’s gallery.
- Go to Light, Color, and Effects panels to make adjustments.
- Use Masking → Select Subject to isolate and highlight your main subject.
- Apply free Lightroom cinematic presets (you can import .DNG files).
- Add a vignette to draw attention toward the center.
With Lightroom Mobile, you can achieve professional-grade cinematic edits right from your smartphone—no computer needed.
Bonus Tip: Add the 35mm Film Effect in Lightroom Mobile
Want that classic film grain look that adds texture and nostalgia?
- Go to the Effects panel.
- Increase Grain to around 20–40.
- Adjust Size and Roughness for more authentic results.
This mimics the 35mm film effect that’s often seen in cinematic photography and gives your image a timeless touch.
Free Lightroom Cinematic Presets Download (2025)
Many photographers offer free cinematic presets for Lightroom Mobile and Desktop. These can be downloaded and imported into your app easily.
Recommended Free Presets:
- Cinematic City Preset – for street and urban shots.
- Golden Hour Cinematic Preset – for warm, glowing portraits.
- Moody Film Preset – for dark, atmospheric photos.
- Teal & Orange Cinematic Preset – for that blockbuster movie color tone
To install:
- Download the .DNG file.
- Import it into Lightroom.
- Tap the three dots → Create Preset → Save it.
- Apply to any photo instantly!
These Lightroom cinematic presets free downloads can save time and give your work a consistent, professional finish.
Common Cinematic Styles You Can Create
When editing cinematic photos, there’s no one-size-fits-all approach. Here are a few popular styles to explore:
- Warm Drama: Deep shadows and warm orange tones.
- Cold Mystery: Cool blue tints with desaturated highlights.
- Retro Film: Added grain, soft fade, and low contrast.
- Modern Cinematic: Crisp tones, teal shadows, and vibrant highlights.
Each style tells a different story—experiment until you find the one that matches your mood and creative intent.
Lightroom Desktop vs Mobile for Cinematic Editing
| Feature | Lightroom Mobile | Lightroom Classic (Desktop) |
| Ease of Use | Beginner-friendly | Advanced control |
| Preset Support | Yes (.DNG) | Yes (.XMP) |
| Masking & AI Tools | Limited but improving | Full suite of AI tools |
| Editing Speed | Fast and convenient | More detailed adjustments |
| Ideal For | On-the-go editing | Professional projects |
If you want to dive deeper into color grading and film emulation, Lightroom Classic is the better choice. But for quick, powerful edits on your phone, Lightroom Mobile is more than capable.
Pro Tips for Cinematic Lightroom Editing
- Shoot in RAW for maximum dynamic range.
- Always use manual white balance—avoid auto for consistent tones.
- Adjust vignette and grain for a more filmic touch.
- Keep highlights controlled and avoid overexposure.
- Use color calibration to fine-tune your overall tone.
These small adjustments make a big difference in creating a cinematic look that feels authentic and visually engaging.
Final Thoughts
Editing cinematic photos in Lightroom is more than just applying filters—it’s about visual storytelling. With tools like the Tone Curve, Color Grading, and AI Masking, you can turn any photo into a cinematic scene full of depth and mood.
Whether you’re using Lightroom Mobile or Lightroom Classic, the key is to experiment, explore color tones, and understand how light interacts with your subject.
With this 2025 Lightroom cinematic editing guide, plus access to free cinematic presets, you have everything you need to elevate your photography to a professional, film-inspired level.


