How to Blur Background in Lightroom (Mobile + Desktop)
Blurring the background of a photo is one of the most effective ways to make your subject stand out and create a professional, cinematic look. Whether you’re editing portraits, travel shots, or lifestyle photos, Lightroom offers powerful tools to achieve a beautiful blurred background effect — without needing Photoshop.
In this complete guide, you’ll learn how to blur background in Lightroom on both Mobile and Desktop (Classic and CC), how to use the Blur Tool, and the best ways to make your photos look naturally soft and visually stunning.

Why Blur Background in Lightroom?
A blurred background (often called bokeh) helps draw attention to the main subject while keeping distractions minimal. In Lightroom, blurring a background can:
- Enhance the depth of field
- Give your portraits a professional, DSLR-like quality
- Create artistic effects and visual storytelling
- Soften messy or unwanted background details
Even if your original image doesn’t have natural bokeh from your camera lens, you can still create a blur background in Lightroom easily using masking and AI tools.
Can You Blur Background in Lightroom?
Yes — you absolutely can! Many users ask, “Can you blur background in Lightroom?” The answer is yes, and there are multiple ways to do it. Lightroom provides several tools and methods depending on your device and version:
- Lightroom Mobile: Ideal for quick edits using the Masking Tool and AI Subject Select.
- Lightroom Classic (Desktop): Offers more precise control using the Radial Filter, Adjustment Brush, and the Lens Blur tool introduced in newer updates.
- Lightroom CC: Perfect for cloud-based editing with similar AI-powered background blur features.
Let’s explore each of these in detail.
How to Blur Background in Lightroom Mobile
Editing on the go? The Lightroom Mobile app allows you to blur background in photos right from your phone — completely free.
Step-by-Step Guide:
- Open Your Image
Launch Lightroom Mobile and select the photo where you want to blur the background. - Use Masking Tool
Tap on the Mask icon (a dotted circle). Choose Select Subject — Lightroom’s AI detection will automatically highlight your subject. - Invert the Selection
Once the subject is selected, tap Invert to switch focus from your subject to the background area. - Adjust Blur Settings
Scroll down to the Detail or Effects tab. Lower the Clarity, Texture, and Sharpness sliders to create a smooth, soft blur. - Fine-Tune
You can manually erase or add mask areas to refine which parts of the image remain in focus. - Save Your Edit
Export or save your photo once you achieve your desired blur level.
This method is simple yet powerful. It’s the easiest way for beginners to blur background in Lightroom mobile free without needing extra apps.
How to Blur Background in Lightroom Desktop (CC & Classic)
When editing on a desktop, you get access to advanced tools and more control over your blur effects. Both Lightroom Classic and Lightroom CC offer methods to blur the background effectively.
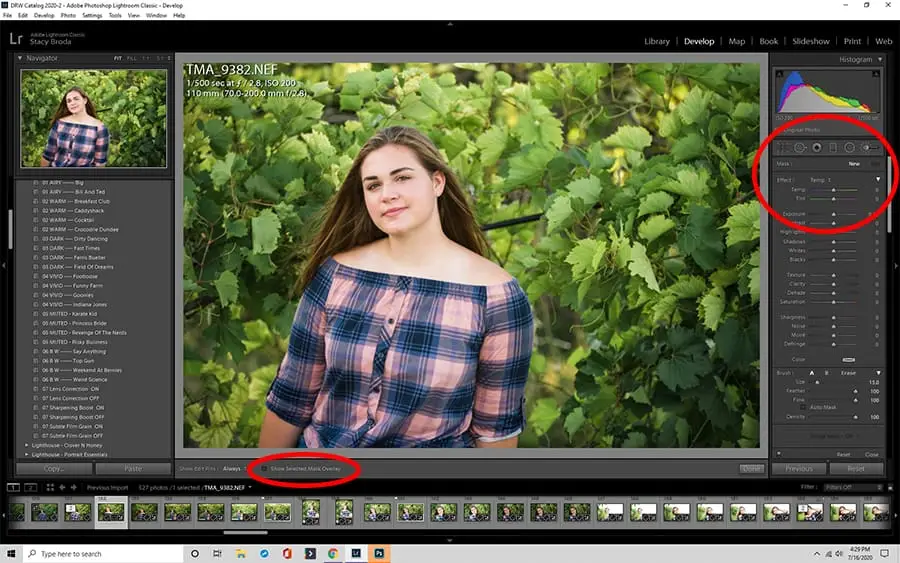
Option 1: Using the Radial Filter (Classic Method)
- Select the Radial Filter
Open your image in the Develop Module. Click the Radial Filter tool (Shift + M). - Draw the Focus Area
Draw an oval around your subject — this defines where the focus will remain. - Invert the Mask
Check Invert Mask so that your adjustments affect everything outside the selected area (the background). - Adjust Blur Settings
Reduce Sharpness and Clarity to blur the background. For a natural look, set Sharpness between -60 and -100, and Clarity around -40 to -80. - Feather and Refine
Increase the Feather to make the blur blend smoothly into the subject’s edges.
This approach gives a soft, lens-like background blur in Lightroom Classic, perfect for wedding portraits or lifestyle images.
Option 2: Using the Adjustment Brush (Manual Control)
The Adjustment Brush gives full control for selective blurring.
- Select the Brush Tool (K)
Choose the Adjustment Brush icon. - Paint the Background
Carefully brush over the areas you want to blur. You can adjust brush size, flow, and feathering for precision. - Reduce Sharpness and Clarity
Set Sharpness and Clarity to negative values to blur the painted regions. - Add Texture Control
Lower Texture slightly for smoother results.
This method works best when Lightroom’s AI subject selection struggles with complex backgrounds or overlapping elements.
Option 3: Using the New Lens Blur (AI-Powered Feature)
Lightroom’s latest 2025 update introduced Lens Blur, an AI-based feature that simulates realistic camera depth of field.
Here’s how to use it:
- Go to Lens Blur Panel
In Lightroom Classic or Lightroom CC, open the Lens Blur panel (right sidebar). - Enable the Feature
Click Apply to activate the AI-based background blur. Lightroom automatically detects the subject and applies a natural depth effect. - Customize Blur Amount
Use the Blur Amount slider to control how soft or intense the effect appears. - Adjust Focal Range
You can shift the focus plane using the Focal Range slider — this helps simulate different aperture depths. - Refine with Masking
Combine Lens Blur with Masking Tools for extra precision and realism.
This Lightroom AI remove and blur tool creates realistic bokeh similar to what you’d get from expensive lenses — but it’s 100% digital.
How to Blur Background in Lightroom CC (Cloud Version)
If you use Lightroom CC (the cloud-based version), the process is nearly identical to the mobile app but with added desktop-level controls.
- Open your image and choose Masking > Select Subject.
- Invert the mask to highlight the background.
- Adjust Sharpness, Clarity, and Texture sliders.
- Optionally, add a Radial Gradient for creative control.
- Fine-tune blur intensity and export your image.
You can also sync your edits across devices, allowing seamless transition between mobile and desktop editing.
Creative Tips for Natural Background Blur in Lightroom
Achieving the perfect background blur takes more than just sliding down the sharpness bar. Here are expert tips for natural, realistic results:
- Use Subtle Adjustments: Don’t over-blur; aim for a soft separation between subject and background.
- Add Warmth: Increase the Temperature slightly for portraits — it makes the background feel softer.
- Combine with Vignetting: Adding a light vignette enhances subject focus.
- Use Presets: Try blur background Lightroom presets for one-click results.
- Apply Gradient Masks: For outdoor photos, use a Linear Gradient to blur the ground or sky gradually.
Best Lightroom Settings for Background Blur
| Setting | Recommended Range | Effect |
| Sharpness | -60 to -100 | Smooths details |
| Clarity | -40 to -80 | Softens textures |
| Texture | -30 to -70 | Evens tone and surface |
| Feather | 70+ | Blends blur naturally |
| Exposure | Optional | Can darken or brighten background |
These settings can be adjusted depending on your image type and desired blur intensity.
Common Questions About Blurring Background in Lightroom
1. Is there a blur tool in Lightroom?
Yes, Lightroom offers blur capabilities through Masking, Lens Blur, and Adjustment Brush tools.
2. Can you blur background in Lightroom mobile free?
Absolutely! The Lightroom Mobile app includes free tools like Select Subject and Invert Mask, allowing background blur without premium subscription.
3. Where is Lens Blur in Lightroom?
The Lens Blur panel is located in the right sidebar under Effects (Lightroom Classic 2025 and newer).
4. What’s the best way to blur background in Lightroom?
Using AI-powered Lens Blur or the Masking Tool provides the most realistic and efficient results.
5. Can I make background blur presets?
Yes, you can save your blur settings as Lightroom presets for quick use across multiple photos.
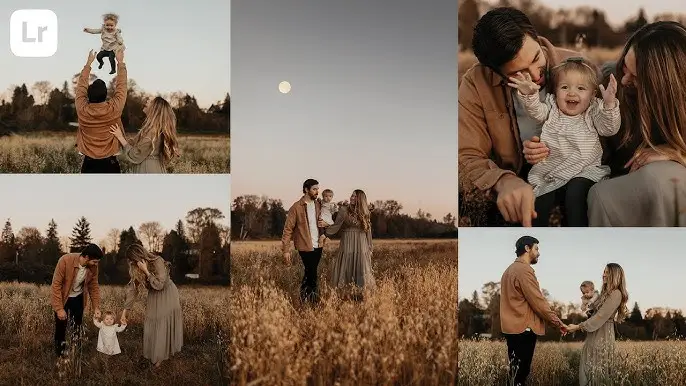
Bonus: Blurring Background for Portraits and Products
For portrait photographers, subtle background blurring enhances focus and skin tone contrast. For product photographers, it isolates your product beautifully.
Use Lightroom AI blur or manual masking to ensure edges remain crisp around your subject while the background transitions smoothly.
Final Thoughts
Knowing how to blur background in Lightroom gives you professional control over your images — whether on mobile, desktop, or Classic versions. Lightroom’s advanced AI tools, masking, and blur filters make it easier than ever to create soft, aesthetic backgrounds that highlight your subject perfectly.
Whether you’re using Lightroom Mobile, Lightroom CC, or Lightroom Classic, each method can help you master photo depth, softness, and focus — essential skills for both beginner and professional photographers in 2025.